How to Create a Blooket Question Set: Student Step-by-Step Guide
Creating your own Blooket question set gives you complete control over what you study. You decide which topics to cover, how hard the questions are, and what content to focus on. It’s also one of the most effective study techniques — the act of writing questions forces you to think deeply about what you actually know. This detailed guide explains how to create a Blooket question set for students and more about this.
How to Create a Blooket Question Set?
Why Creating Your Own Set Is Worth It?
Most students jump straight to finding pre-made sets on Discover. That works well for general topics. But creating your own set is better when:
- You need questions about your specific teacher’s content (a reading, a custom rubric, class-specific vocab)
- You want to control difficulty — harder, exam-style questions or basic recall, depending on what you need
- You’re preparing for a test on very specific content that a generic public set won’t have
- You learn better through active recall — making questions is a proven memorization strategy
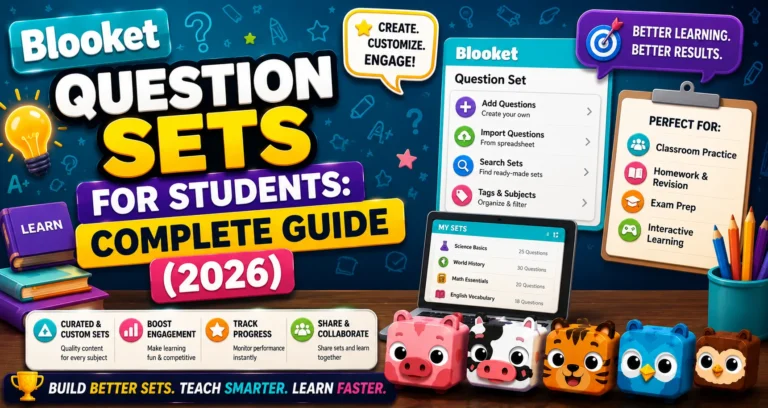
Complete Guide About → Blooket Question Sets For Students
What You Need Before Starting?
- A Blooket account (log in at blooket.com)
- A list of topics or questions you want to include
- 5–15 minutes, depending on how many questions you’re asking
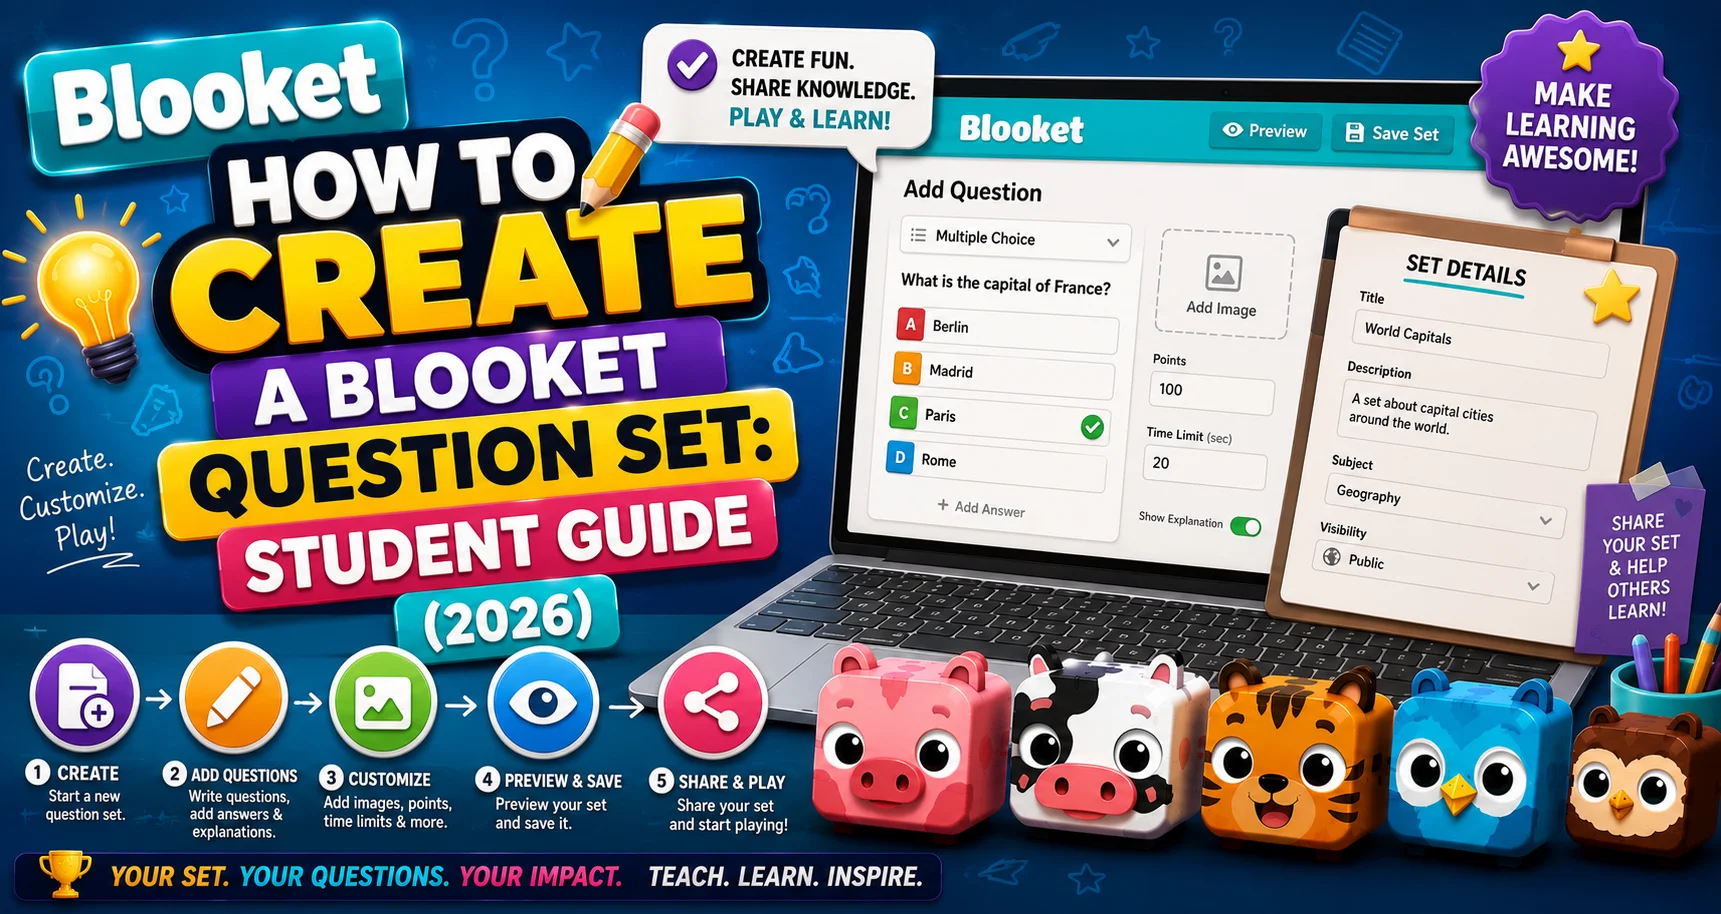
Step-by-Step: Creating a Question Set
Step 1: Navigate to the Create Page
Log in to your Blooket account. From your dashboard, select the “Create” button. This opens the Set Creator page.
Step 2: Add a Title and Description
Add a title and brief description for your Question Set.
→ Title tips: Be specific. “Chapter 7 Vocabulary — Cell Biology” is more useful than “Science Set.” If you ever share your set or come back to it months later, a clear title saves you from having to open the set to remember what it contains.
Tip from Blooket: Use descriptive terms like grade level and topic.
→ Description: The description is optional, but helps if your set is Public. Other users searching Discover can see the description — use it to mention the subject, grade level, number of questions, or specific topics covered.
Step 3: Add a Cover Image (Optional)
You can also add a Cover Image to help you and others identify the Question Set. Choose something relevant — a photo, graphic, or icon that makes the set visually identifiable in your My Sets library. This is purely cosmetic, but it helps when you have many sets.
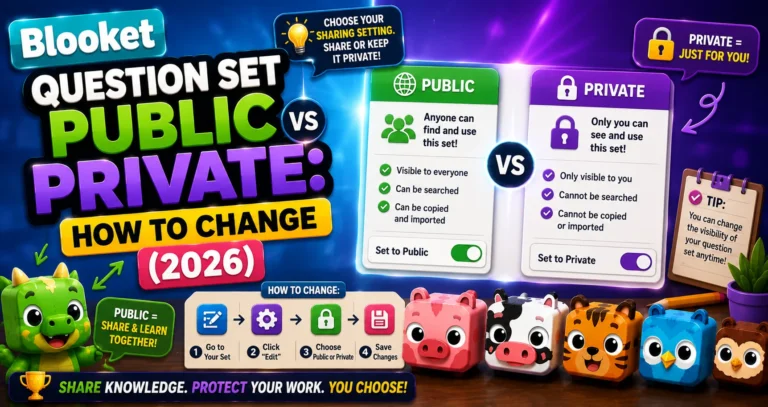
Step 4: Choose Public or Private
Decide whether you want your set to be Public (default) or Private.
→ Other users can discover public sets through Discover. This also lets you share a link to your set, making it easy to share with teachers, parents, and other users.
→ Private sets are only visible to you, but can still be used to host live games.
Important: All of these settings can be changed after the set has been created. If you’re not sure, leave it Public for now — you can switch it to Private later from My Sets.
Step-by-Step Guide → How to Make a Question Set Public or Private in Blooket
Step 5: Click “Create”
Click “Create” to save your set’s basic information and open the question editor. Your set is now created — you’ll add questions in the next steps.
Step 6: Click “Add Question”
In the question editor, click “Add Question” to open the question builder panel.
Step 7: Build Your Question
Fill in these fields for each question:
- Question text: Write the question clearly. Keep it to one idea — avoid combining two questions into one.
- Answer options: Add 2–4 answer choices. You can leave Answer 3 and Answer 4 blank if you only want 2 options (useful for True/False).
- Select which answers are correct: Be sure to select which answers are correct! Click the checkbox next to the correct answer to mark it. You can mark more than one answer correct if the question has multiple valid responses.
- Random Order toggle: By default, this is on. It shuffles the order of answer choices so students don’t memorize the positions of the answers. Keep it on for most questions.
Step 7a: Creating a True/False Question
True/False questions are a special case of multiple choice. Here’s how to set them up correctly:
- In the Answer 1 field, type “True.”
- In the Answer 2 field, type “False.”
- Leave Answer 3 and Answer 4 blank
- Mark the correct answer (True or False)
- Uncheck the “Random Order” box
Blooket recommends unchecking Random Order for True/False questions. Here’s why: if Random Order is on, “True” and “False” will randomly swap positions. Students lose the spatial familiarity they rely on with True/False questions — it adds confusion without any learning benefit.
Step 8: Click “Save”
Once you are done with your question, click “Save” in the top right of the question box. The question is added to your set.
Step 9: Repeat for All Questions
Repeat steps 6–8 to add additional questions until your set is complete.
How many questions should you add?
- 8–10 questions: Good for a quick review or warmup
- 15–25 questions: Standard set that works well in most game modes
- 30+ questions: Comprehensive study set for a major exam
There’s no minimum or maximum — Blooket accepts any number.
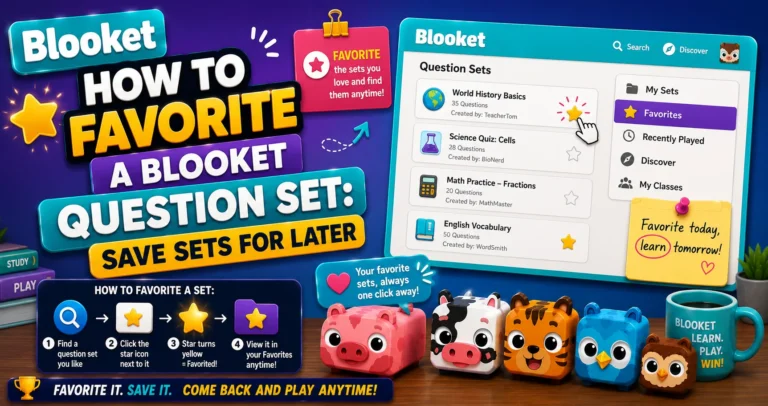
Save Sets Guide → How to Favorite a Blooket Question Set
After Your Set is Complete
Your set is automatically saved as you build it. When you’re done, your set appears in My Sets on your dashboard and is ready to use immediately.
From the set’s preview page, you can:
- Play Solo — Start a solo game right now for immediate practice
- Change Privacy — Make it Public if you want to share it
- Edit — Return to add more questions or fix errors
Tip: Before studying with your new set, play it in Solo → Study Mode first. This gives you a full preview of every question — you’ll spot any typos or errors before they show up in a real session.
Solo Guide → How to Play a Solo Game in Blooket